Thinking about this even more...
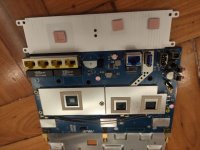
Given Id used a 3mm piece of copper.... I would not put copper on the wifi chips and would retain the pads or at the very least measure and use exact sized copper for all 3.
The screws that mount the heatsink are short, fine thread, and 3 or 4mm screws. The heatsink has 'some' flex but I fear disaster will strike someone if they try and remount their heatsink with 3 pieces of oversized copper and they end up crushing their CPU die (corners of a die are extremely fragile) trying to put in the screws
Remember this is a warranty voiding MOD/HACK and like all physical mods/hacks it comes with its own inherent device killing risks. You've been warned.
Apologies for the titling and wording of this thread, but this thread was not intended to be a guide but more a blog about about my experience modding my unit and it currently lies somewhere in the middle. Im a believer in well written mod guides which would require measuring clearances and providing exact details, things I never got to. If you've never done something like this before read the disclaimer above a few more times, if you're still confident in trying it out there's nothing like the thrill of seeing your handy work full fill the goals you set for it, in this case for me it grossly exceeded my expectations, since the compound has cured and a little cooler here my unit idles at 38C and hit a low of 36.5 with 1 80mm fan. Thread probably should have been titled AC86U Heat Sink Hack
")
My way of thinking
Hack=lacking in details, just the basics, if you do this + this you get this
Mod=descriptive guide, measurements, methods, similar to a 'how to'
So again, perform these alterations at your own risk, the information provided is what worked for ME
Happy routing and modding... er hacking

Mav
custom script output
View attachment 29528