You are using an out of date browser. It may not display this or other websites correctly.
You should upgrade or use an alternative browser.
You should upgrade or use an alternative browser.
Voxel
Part of the Furniture
Thanks for your tests.
Voxel.
In general QoS update does not matter for your problem. Old QoS DB is for people who faced problems with new QoS crash.After update:
Voxel.
Voxel
Part of the Furniture
I tried that "/var/log/openvpn-client.log" but it would output as "/bin/ash: /var/log/openvpnclient.log: Permission denied"
How do I enable ssh access on router & just drag & drop this .ovpn file via WinSCP? I tried "ip ssh server" command, etc. but it's not recognized.
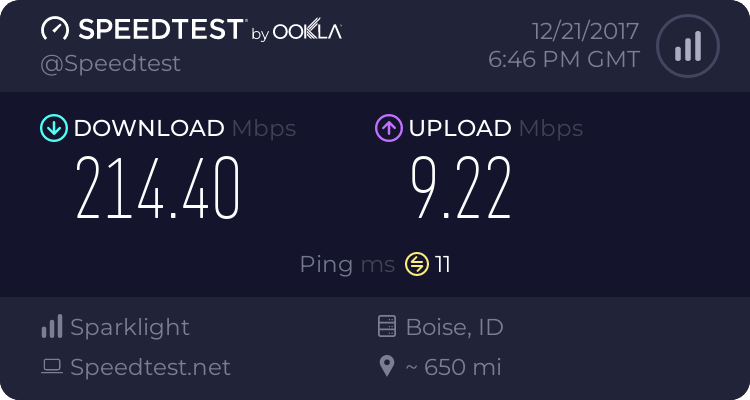
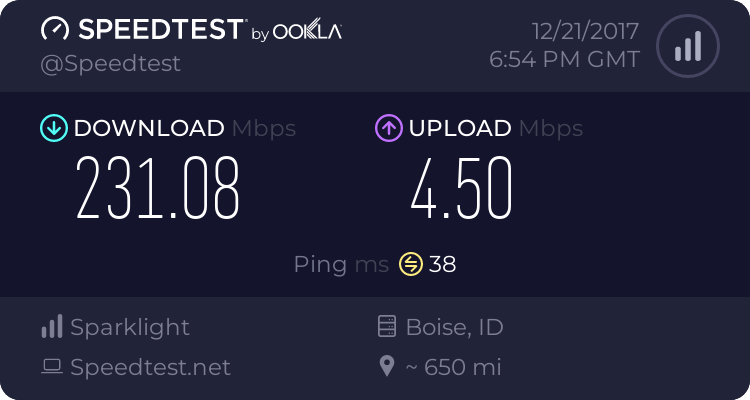
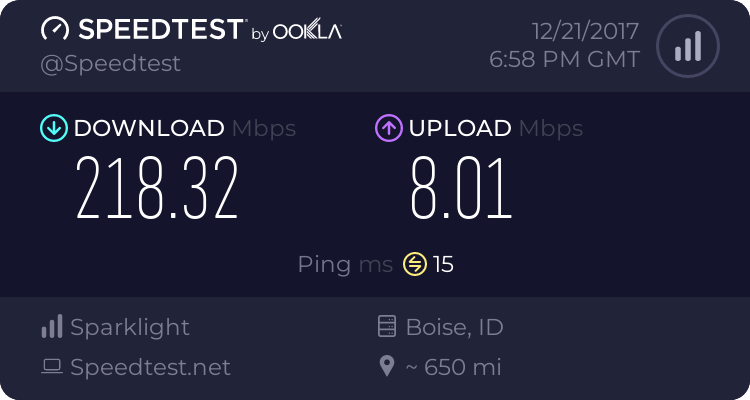
Can this OpenVPN client be installed on stock firmware? I have a problem with Voxel firmware upload speed taking a nosedive from around 25Mbps (stock) down to 1Mbps or even less (Voxel) on both wired/wireless internet speed test. On Dynamic Qos setting I have to set define internet bandwidth as Speedtest detection on Netgear Genie is slowing a much worse result.
I'd suggest to use today's 44SF for your tests. And sorry, stock FW does not support OpenVPN client.
Voxel.
e38BimmerFN
Very Senior Member
Ok. just making test results is all. Definitely looks great now. Will put this to the test this holiday weekend.
Thank you for your efforts.
Thank you for your efforts.
Thanks for your tests.
In general QoS update does not matter for your problem. Old QoS DB is for people who faced problems with new QoS crash.
Voxel.
kamoj
Very Senior Member
I tried that "/var/log/openvpn-client.log" but it would output as "/bin/ash: /var/log/openvpnclient.log: Permission denied"
1). Both your files xxx.ovpn and auth.txt must NOT be edited in a Windows-editor like notepad.
Files created in Windows with Windows editors get the "wrong" invisible end-of-line characters.
The router has another operating system (Linux-like) and expects another end-of-line.
So the files xxx.ovpn and auth.txt below must created/edited and saved the correct "Linux-way".
2). Create a file with name auth.txt on your USB-stick, at the same place as your xxx.ovpn file.
3). The auth.txt file shall contains 2 lines only, (No tab or blank/space characters):
your-ipvanish-userid
your-ipvanish-password
4). Found some errors in your xxx.ovpn file, so use the following text instead in your xxx.ovpn file:
client
dev tun
tun-mtu 1500
#mssfix 1460
proto udp
#proto tcp
remote chi-a25.ipvanish.com 443
resolv-retry infinite
nobind
persist-key
persist-tun
persist-remote-ip
#ca ca.ipvanish.com.crt
auth-user-pass auth.txt
comp-lzo
verb 3
auth SHA256
cipher AES-256-CBC
keysize 256
tls-cipher TLS-DHE-RSA-WITH-AES-256-CBC-SHA:TLS-DHE-DSS-WITH-AES-256-CBC-SHA:TLS-RSA-WITH-AES-256-CBC-SHA
#tls-remote chi-a25.ipvanish.com
verify-x509-name chi-a25.ipvanish.com name
script-security 3 system
-----BEGIN CERTIFICATE-----
MIIErTCCA5WgAwIBAgIJAMYKzSS8uPKDMA0GCSqGSIb3DQEBDQUAMIGVMQswCQYD
VQQGEwJVUzELMAkGA1UECBMCRkwxFDASBgNVBAcTC1dpbnRlciBQYXJrMREwDwYD
VQQKEwhJUFZhbmlzaDEVMBMGA1UECxMMSVBWYW5pc2ggVlBOMRQwEgYDVQQDEwtJ
UFZhbmlzaCBDQTEjMCEGCSqGSIb3DQEJARYUc3VwcG9ydEBpcHZhbmlzaC5jb20w
HhcNMTIwMTExMTkzMjIwWhcNMjgxMTAyMTkzMjIwWjCBlTELMAkGA1UEBhMCVVMx
CzAJBgNVBAgTAkZMMRQwEgYDVQQHEwtXaW50ZXIgUGFyazERMA8GA1UEChMISVBW
YW5pc2gxFTATBgNVBAsTDElQVmFuaXNoIFZQTjEUMBIGA1UEAxMLSVBWYW5pc2gg
Q0ExIzAhBgkqhkiG9w0BCQEWFHN1cHBvcnRAaXB2YW5pc2guY29tMIIBIjANBgkq
hkiG9w0BAQEFAAOCAQ8AMIIBCgKCAQEAt9DBWNr/IKOuY3TmDP5x7vYZR0DGxLbX
U8TyAzBbjUtFFMbhxlHiXVQrZHmgzih94x7BgXM7tWpmMKYVb+gNaqMdWE680Qm3
nOwmhy/dulXDkEHAwD05i/iTx4ZaUdtV2vsKBxRg1vdC4AEiwD7bqV4HOi13xcG9
71aQ55Mj1KeCdA0aNvpat1LWx2jjWxsfI8s2Lv5Fkoi1HO1+vTnnaEsJZrBgAkLX
pItqP29Lik3/OBIvkBIxlKrhiVPixE5qNiD+eSPirsmROvsyIonoJtuY4Dw5K6pc
NlKyYiwo1IOFYU3YxffwFJk+bSW4WVBhsdf5dGxq/uOHmuz5gdwxCwIDAQABo4H9
MIH6MAwGA1UdEwQFMAMBAf8wHQYDVR0OBBYEFEv9FCWJHefBcIPX9p8RHCVOGe6u
MIHKBgNVHSMEgcIwgb+AFEv9FCWJHefBcIPX9p8RHCVOGe6uoYGbpIGYMIGVMQsw
CQYDVQQGEwJVUzELMAkGA1UECBMCRkwxFDASBgNVBAcTC1dpbnRlciBQYXJrMREw
DwYDVQQKEwhJUFZhbmlzaDEVMBMGA1UECxMMSVBWYW5pc2ggVlBOMRQwEgYDVQQD
EwtJUFZhbmlzaCBDQTEjMCEGCSqGSIb3DQEJARYUc3VwcG9ydEBpcHZhbmlzaC5j
b22CCQDGCs0kvLjygzANBgkqhkiG9w0BAQ0FAAOCAQEAI2dkh/43ksV2fdYpVGhY
aFZPVqCJoToCez0IvOmLeLGzow+EOSrY508oyjYeNP4VJEjApqo0NrMbKl8g/8bp
LBcotOCF1c1HZ+y9v7648uumh01SMjsbBeHOuQcLb+7gX6c0pEmxWv8qj5JiW3/1
L1bktnjW5Yp5oFkFSMXjOnIoYKHyKLjN2jtwH6XowUNYpg4qVtKU0CXPdOznWcd9
/zSfa393HwJPeeVLbKYaFMC4IEbIUmKYtWyoJ9pJ58smU3pWsHZUg9Zc0LZZNjkN
lBdQSLmUHAJ33Bd7pJS0JQeiWviC+4UTmzEWRKa7pDGnYRYNu2cUo0/voStphv8E
VA==
-----END CERTIFICATE-----
5). Insert the USB-stick in the router
6). Wait 1 minute
7). If not working; Reboot the router from the Netgear web-interface: Netgear Genie, Advanced, Reboot
8). If still not working, wait 1 minute and Reboot the router the same way again.
9). To look at the OpenVPN log-file:
- Enable Telnet at e.g. http://192.168.1.1/debug.htm ,
- Login from a comman-prompt with: telnet 192.168.1.1
- Issue the Linux-command:
cat /var/log/openvpn-client.log
Hope this was to some help.
Voxel
Part of the Furniture
I tried above. Seems like OpenVPN client is installed but won't start. I'm now able to see the log file & it says...
Code:Options error: Unrecognized option or missing or extra parameter (s) in /etc/openvpn/config/client/ipvanish-US-Chicago-chi-a25.ovpn:23: script-security (2.4.4) Use --help for more information. Error: OpenVPN client start failed.
Might be the entries with # sign perhaps? I tried removing those entries but still the OpenVPN client wont start.
In general log says what's wrong. OpenVPN dislikes the line:
Code:
script-security 3 systemtry to leave
Code:
script-security 3And as I said it is better to flash 44SF.
Voxel.
kamoj
Very Senior Member
Sorry for confusing you with the #-marked lines (they are made comments only that way).
I browsed the ipvanish web-site and downloaded their various guides and made this xxx.ovpn file from their guides.
(The erroneous line "script-security 3 system" is from the ipvanish guide "DD-WRT Router OpenVPN Setup".
Probably the whole line can be removed.))
Hope you got it working by now!
And I agree with Voxel, upgrade to latest Voxel Firmware.
I tried above. Seems like OpenVPN client is installed but won't start. I'm now able to see the log file & it says...
Code:Options error: Unrecognized option or missing or extra parameter (s) in /etc/openvpn/config/client/ipvanish-US-Chicago-chi-a25.ovpn:23: script-security (2.4.4) Use --help for more information. Error: OpenVPN client start failed.
Might be the entries with # sign perhaps? I tried removing those entries but still the OpenVPN client wont start.
thekubiaks
New Around Here
Voxel,
Easy question, I am switching to your firmware from Kong's. Can I just flash the img or should I revert to stock and then flash? I don't want to brick my R7800. thx
Easy question, I am switching to your firmware from Kong's. Can I just flash the img or should I revert to stock and then flash? I don't want to brick my R7800. thx
Voxel,
Easy question, I am switching to your firmware from Kong's. Can I just flash the img or should I revert to stock and then flash? I don't want to brick my R7800. thx
This is what I have done in the past on my R7800 router (with no problems) when I went from DD-WRT to Voxel's firmware:
1) Go to Kong's website http://www.desipro.de/ddwrt/K3-AC-IPQ806X/NetgearFW/ and download the "ddwrt-to-netgear-fw-R7800.bin" file.
2) Log into the DD-WRT control panel (http://192.168.1.1/). In DD-WRT go to the "Administration" tab, click on "Factory Defaults", click on "Yes", and then click on "Apply Settings". Router will be reset to DD-WRT default settings.
3) After default settings are reset, Enter a new password and Log into the DD-WRT control panel (http://192.168.1.1/). In DD-WRT go to the "Administration" tab, click on the "Firmware Update" tab. In the "Firmware Update" tab select the following: After flashing, reset to "Default Settings". Click on the "Browse" button and select the "ddwrt-to-netgear-fw-R7800.bin" file you downloaded in step #1. Click on the "Upgrade" button and wait for the "ddwrt-to-netgear-fw-R7800.bin" firmware to be loaded and the R7800 router to reboot.
4) Go to "http://192.168.1.1/" or "http://www.routerlogin.net/" and you should be at the normal Netgear router startup sequence.
5) Once you complete the normal Netgear router startup sequence you can access the Netgear Genie webpage at "http://192.168.1.1/" or "http://www.routerlogin.net/". From Netgear Genie you can load Voxel's firmware. Reset your R7800 router to default settings using the reset button on the back of the R7800 or from Netgear Genie: Click on "Advanced" tab, click on "Administration", click on "Backup Settings" and under "Revert to factory default settings" click on the "Erase" button. Answer "Yes" and the R7800 router will reboot to default settings.
6) Go to "http://192.168.1.1/" or "http://www.routerlogin.net/" and you should be at the normal Netgear router startup sequence. Run thru the Netgear Genie setup process.
7) Customize the settings on your R7800.
Note: My router always wants to default to "WPA-PSK [TKIP] + WPA2-PSK [AES]" after a reset and I only want use only "WPA2-PSK [AES]". This is one of the items that really annoy me with Netgear Genie.
Also, there is the following note when you click on "FAQ" in Kong's website:
Problem: Radios are not available when flashing back to Netgear FW:
Solution: Netgear partition needs to be cleaned using command:
mtd erase netgear
This command must be executed on a console after you flashed back to netgear fw.
You should be able to enabled telnet via: http://192.168.1.1/debug.htm
Alternatively you can run this command in a serial console, in case you have a USB-TTL adapter connected.
I have never had the above radio problem but if you do then go to "http://routerlogin.net/debug.htm", click the "Enable Telnet" checkbox. Then you can open Telnet, Type "Telnet 192.168.1.1" and after you get a command prompt type in "mtd erase netgear" and hit enter.
This was a much longer note than I expected to type. I hope it helps...
thekubiaks
New Around Here
Thank you rbird2!
Voxel
Part of the Furniture
Thank you rbird2!
Small note: it is better to use latest version (1.0.2.44SF). Guys like it much more. This thread is for 1.0.2.43SF.
Voxel.
e38BimmerFN
Very Senior Member
Yes, come use v44SF. Good version. Best since v30's
Similar threads
- Replies
- 6
- Views
- 238
- Replies
- 13
- Views
- 1K
- Replies
- 3
- Views
- 117
- Replies
- 14
- Views
- 963
- Replies
- 1
- Views
- 219
Similar threads
Similar threads
-
Voxel Custom firmware build for R9000/R8900 v. 1.0.4.84HF
- Started by Voxel
- Replies: 3
-
Voxel Custom firmware build for R7800 v. 1.0.2.118SF
- Started by Voxel
- Replies: 6
-
Voxel Custom firmware build for Orbi LBR20 v. 9.2.5.2.52SF-HW
- Started by Voxel
- Replies: 1
-
Voxel Custom firmware build for R9000/R8900 v. 1.0.4.83HF
- Started by Voxel
- Replies: 1
-
Voxel Custom firmware build for R7800 v. 1.0.2.117SF
- Started by Voxel
- Replies: 13
-
Voxel Custom firmware build for Orbi LBR20 v. 9.2.5.2.51SF-HW
- Started by Voxel
- Replies: 1
-
Voxel Custom firmware build for R9000/R8900 v. 1.0.4.82HF
- Started by Voxel
- Replies: 3
-
Voxel Custom firmware build for R7800 v. 1.0.2.116SF
- Started by Voxel
- Replies: 14
Latest threads
-
Yes, its another "Which should I buy, RT-BE86U or RT-BE92U?" question
- Started by treefu
- Replies: 5
-
-
Setting up a Wireguard Server to access Plex away from home
- Started by Bitrudeuk
- Replies: 0
-
Plex Playback (wifi) issues/question
- Started by lcalamar
- Replies: 7
-
Asuswrt-Merlin 3004.288.8_4 /jffs Partition Nuked on Random Reboot
- Started by garycnew
- Replies: 3
Support SNBForums w/ Amazon
If you'd like to support SNBForums, just use this link and buy anything on Amazon. Thanks!
Sign Up For SNBForums Daily Digest
Get an update of what's new every day delivered to your mailbox. Sign up here!


