What's new

antenna question

  • SNBForums Code of Conduct

    SNBForums is a community for everyone, no matter what their level of experience.

    Please be tolerant and patient of others, especially newcomers. We are all here to share and learn!

    The rules are simple: Be patient, be nice, be helpful or be gone!

So, while I wait for my parts, an interim update with some photos, for my little project:

ASUS ROUTER:

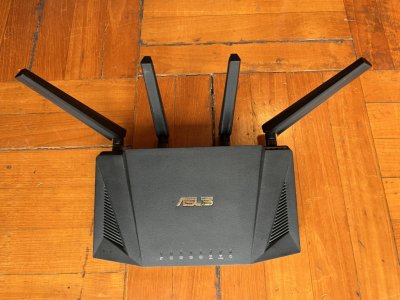
RT-AX58U = RT-AX3000
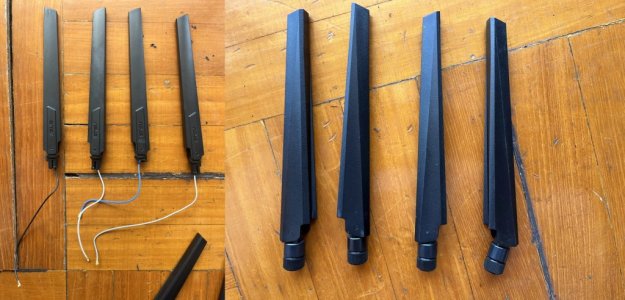
Fixed Antenna 15cm length x 4
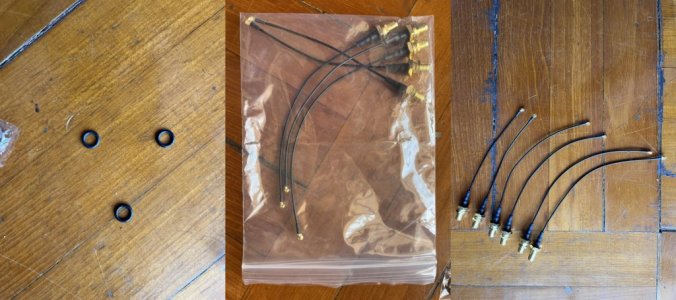
PCB Connectors: MHF1 / IPX1 Pigtails with 2.2mm Height
  • Black 15cm
  • White 12cm
  • Blue 10cm
  • Grey 16cm
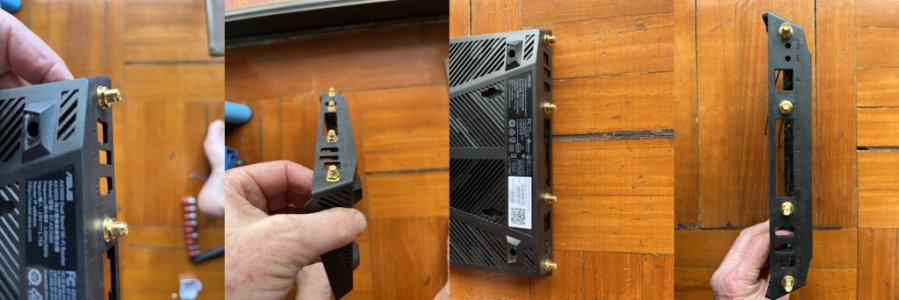
Note the RT-AX86U (as an example) has a female Antenna Connecor (male on the Router) so need Need RP-SMA Connector RP-SMA Female. I bought 4 (3+1) RT-AX86U Antennas they are the same length and similar style to the RT-AX58U.

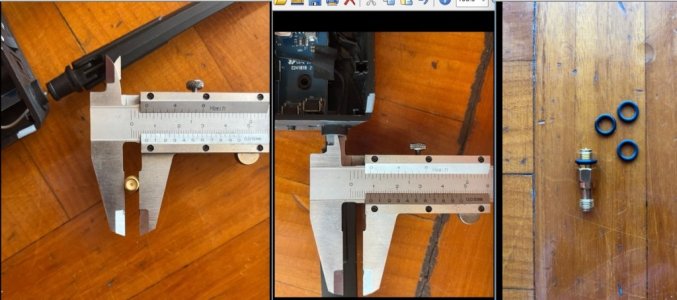
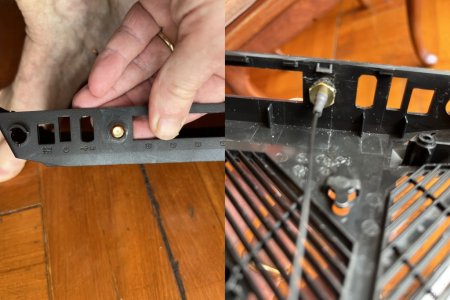
Measured Specs of Existing Setup:
  • Router Wall Thickness 2.6mm "Bulkhead"
  • Press-fit Hole Dia 8.5mm
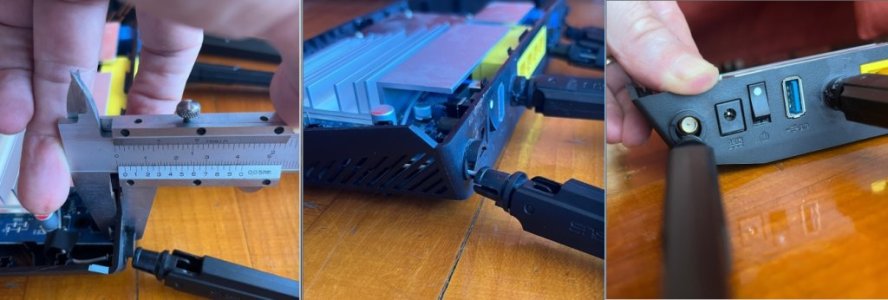
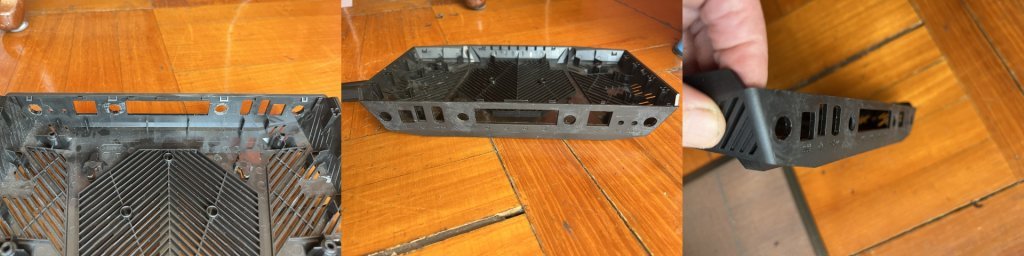
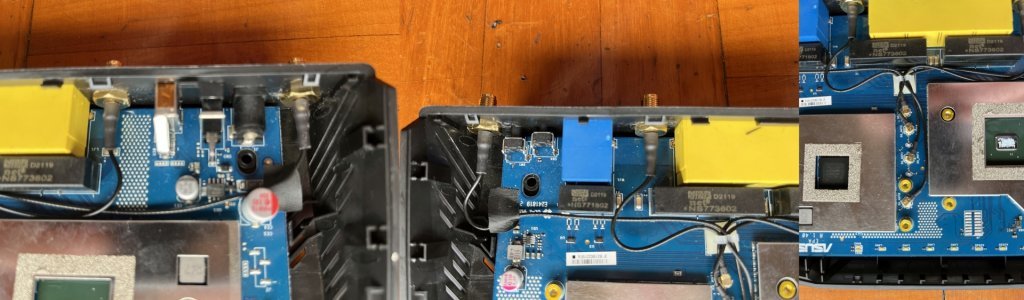
I used a pair of needle-nose pliers to gently squeeze the nibs inside the bulkead and then pull the Antennas out gently. I will disengage the IPX end of the coax from the PCB when I am satisfied it will all work, I left them in case I need to reassemble as is.

Details of NEW Connectors:
  • RP-SMA Thread Dia 6.3mm
  • Thread length 11.4mm
  • Backing Nut Size 11mm.
Now, I have ordered a "waterproof" version of the RP-SMA Connector, not because I am putting it under water :), but because that option has a bigger nut,, so as to fit the ‘waterproof‘ O-ring seal. I am "hoping" that nut will be big enough, if centralised in the existing plastic wall using a spacer, to not pull through the 8.5mm hole.

Anyone looking at the specs and photos can quickly see that 6.3mm << 8.5mm so there is a lot of space around that connector (see photo). It's not just a slot in and do up fix. It needs either a centraliser or if that does not work:
  1. a new bulkhead glued to the back, which will need a longer (15mm is available) RP-SMA connector; or
  2. an even larger backing built into the RP-SMA connector - there are connectors available with a little plate on the back with two (or even four) holes that would definitealy work, but at the moment I cannot find 1.37mm Coax versions of these only RG178 - although it might be OK (same signal loss, just slightly less flexible, ref. https://www.data-alliance.net/blog/137mm-lowloss-cable-for-ufl-connectors/)
All these assume I can do it up tight enough so it does not spin; the design holes have a "D" shape so the RP-SMA is fixed (it has one flat surface to mate with that D). I won't have that luxury, so I need to be able to crank it up against one of those crenellated washers and hope it holds, especially with the o-ring against the nut; or maybe just glue it...

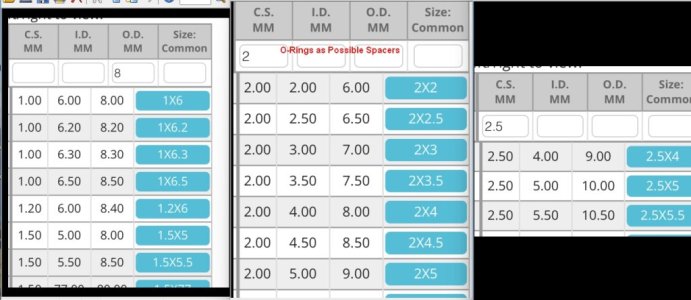
As regards suitable centralisers:

Well they need to be ~6mm ID (stretch over the thread) and 8.5mm OD and with about 2.5mm wall thickness (to fit inside the plastic bulkhead).


That's it for now... more in 3 weeks or so :)

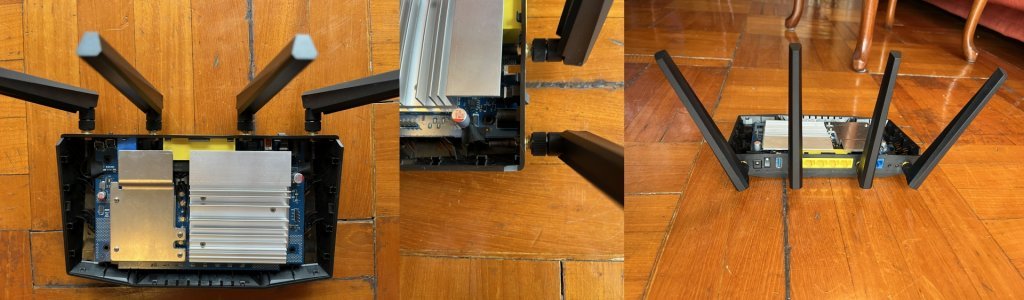
You're probably wondering "why?" It's just a project really, and it will enable me to use the Antennas in any orientation (you will recall above, I superglued a broken antenna and it is stuck in Wall-Mount only mode).
 

Attachments

  • IMG_5586.jpg
    IMG_5586.jpg
    76.3 KB · Views: 51
  • IMG_5587.JPG
    IMG_5587.JPG
    90.7 KB · Views: 39
  • IMG_5598.JPG
    IMG_5598.JPG
    66.9 KB · Views: 45
Last edited:
Here are some more connector and spacer details:
 

Attachments

  • LLL.jpg
    LLL.jpg
    64 KB · Views: 35
  • ORings.jpg
    ORings.jpg
    89.1 KB · Views: 32
  • Three Row.jpg
    Three Row.jpg
    44.7 KB · Views: 36
Right, I said I would be back in 3 weeks and here I am.

The parts arrived (various length pigtails and 4# antennas) so I removed the plastic nibs molded onto the casing with a fine hacksaw, then trimmed and then scraped with a single-edged razor blade.

The threaded part was "just" long enough so that it met the antenna without bottoming out on the screw. I had to tighten the RP-SMA mounts (not the antenna) up pretty firmly to make this happen.

  • The order was insert pigtail with threaded RP-SMA from the inside (it has a very small red "waterproof" seal up against the fixed backing nut. The nut was big enough not to go through the hole; then
  • A 5x2 or 6x2 (a very snug) O-Ring to act as spacer/centraliser in the hole from the outside; then
  • The supplied crenellated washer, which is just big enough to push the O-Ring into the hole; then
  • The spring washer; then
  • The Nut. Hold the inside with pliers, socket with screwdriver mount on the nut to tighten, keep the connector-ends flat; then
  • Make bends to locate pigtails in the clip; then
  • GENTLY but firmly push the tiny little IPX1 clips onto the PCB Mounts. These things don't really go "click" in my experience, so they are the hardest to know if it is right or not. In any case they pushed on OK, but need patience.
Photos in this and the next few posts.
 

Attachments

  • A-Mounts Prior to Trimming.jpg
    A-Mounts Prior to Trimming.jpg
    96.7 KB · Views: 22
  • B-Mounts After to Trimming.jpg
    B-Mounts After to Trimming.jpg
    60.7 KB · Views: 20
  • C-Pigtails and O-Rings.jpg
    C-Pigtails and O-Rings.jpg
    117.1 KB · Views: 25
  • D-Antenna Old and New.jpg
    D-Antenna Old and New.jpg
    121.9 KB · Views: 26
  • E-Pics showing space O-Ring gets squeezed into.jpg
    E-Pics showing space O-Ring gets squeezed into.jpg
    110.5 KB · Views: 35
Last edited:
Next and Final Set. Would I do it again? Maybe not, but it saved my Router and was fun to learn.
Value wise? If you have some Antennas probably OK. Pigtails were cheap.
 

Attachments

  • F-RP-SMA Mounts in Place with O-Ring Spacer.jpg
    F-RP-SMA Mounts in Place with O-Ring Spacer.jpg
    70.7 KB · Views: 35
  • G-Pigtails in Place and Clipped on.jpg
    G-Pigtails in Place and Clipped on.jpg
    75.6 KB · Views: 26
  • H-Final Inside.jpg
    H-Final Inside.jpg
    179.4 KB · Views: 25
  • Y-Complete Prior to Cover Refit.jpg
    Y-Complete Prior to Cover Refit.jpg
    72.1 KB · Views: 25
  • Z-Final Outside.jpg
    Z-Final Outside.jpg
    162.8 KB · Views: 25
Last edited:

Latest threads

Sign Up For SNBForums Daily Digest

Get an update of what's new every day delivered to your mailbox. Sign up here!
Top