What's new
  • SNBForums Code of Conduct

    SNBForums is a community for everyone, no matter what their level of experience.

    Please be tolerant and patient of others, especially newcomers. We are all here to share and learn!

    The rules are simple: Be patient, be nice, be helpful or be gone!

Where does it store the WebUI certificate

Argh123

Occasional Visitor
I uploaded a lets encrypt ssl to Asus WebUI and it asked for the .cer and .key I wanted to know where does it store it? I SSHed into the router and still could not find it.
 

Attachments

  • 1676164227902.png
    1676164227902.png
    18 KB · Views: 75
If you are looking for parameters entered via the web GUI, you'll want to 'inspect' the html source code for 'name' attribute for the parameter entry field, and then ssh into the router and do something like
Code:
username$ nvram show | egrep 'key|cert|crt'
where the terms between the ' 's would match what you are looking for. You may need to search for multiple acronyms since the GUI form field names don't necessarily match the nvram keys. On my system (gt-ax6000) it looks like the public key gets stored in sshd_authkeys. You will see the files probably under /tmp/etc but they are auto-generated when the firmware loads on boot so can't be edited unlike nvram vars. Also on my version of ASUS router I'm seeing a cert.tgz file under /jffs/ which contains both cert and key, so this may be editable since /jffs/ is persistent.
 
Last edited:
I used a translation tool to read the sentence because I'm not an English-speaking user.

The author wants to confirm where the certificate is actually uploaded on the router when uploading a certificate in the `WebUI` -> `WAN` -> `DDNS`.

If that's the intention, it's correct. The certificate is uploaded to `/jffs/.cert`.

1697894295353.png
 
Premetto dicendo che non sono esperto di web e certificati. ho nella rete un rasberry con installato jellyfin. Non ho problemi con http ma vorrei abilitare anche il hptts. Jellyfin mi chiede "il percorso del certificato" .
1) posso usare il "Certificato gratis di Let's Encrypt" del router?
2) se la risposta è positiva come posso indicare il percorso?
I'll start by saying that I'm not an expert on the web and certificates. I have a Raspberry Pi with Jellyfin installed on my network. I have no problems with HTTP but I would also like to enable HPTTS. Jellyfin asks me for the "path to the certificate".
1) Can I use the router's "Free Let's Encrypt Certificate"?
2) If the answer is yes, how can I specify the path?
 

Attachments

  • Screenshot 2025-12-23 174451.png
    Screenshot 2025-12-23 174451.png
    77.8 KB · Views: 4
I'll start by saying that I'm not an expert on the web and certificates. I have a Raspberry Pi with Jellyfin installed on my network. I have no problems with HTTP but I would also like to enable HPTTS. Jellyfin asks me for the "path to the certificate".
1) Can I use the router's "Free Let's Encrypt Certificate"?
2) If the answer is yes, how can I specify the path?
You can find the cert on the router in /jffs/.le. Afraid you will not be able to re-use on another system as
the certs are using hostname.domain name. Getting another Letsencrypt cert is pretty straight forward using certbot.
If you are using a debian based os on the your pi check out sudo apt info certbot.
 
Leggevo che cerbot deve dialogare sulla porta 80, già impegnata (Forwarded) sul router Asus per far leggere il DB alla mia applicazione Android motopark.

I read that cerbot must communicate on port 80, already busy (Forwarded) on the Asus router to allow my Android motopark application to read the DB.
 
Leggevo che cerbot deve dialogare sulla porta 80, già impegnata (Forwarded) sul router Asus per far leggere il DB alla mia applicazione Android motopark.
Only english pls.
 
Leggevo che cerbot deve dialogare sulla porta 80, già impegnata (Forwarded) sul router Asus per far leggere il DB alla mia applicazione Android motopark.

I read that cerbot must communicate on port 80, already busy (Forwarded) on the Asus router to allow my Android motopark application to read the DB.
Look into dns challenge. It does not require port forwarding.
https://letsencrypt.org/docs/challenge-types/
 
sono un testone, un mulo ed ho provato comunque ad utilizzare le informazioni date ed ho scoperto che funziona ugualmente. io ho ddns ma dovrebbe essere la stessa cosa con asuscomm.com. ecco come ho fatto

I'm a stubborn and unintelligent person, and I've tried to use the information provided anyway, but I've found that it works just as well. I have DDNS, but it should be the same with asuscomm.com. Here's what I did.

Rassberry IP: 192.168.1.200

1. Setting up passwordless login (SSH key)

For the script to work automatically, the Raspberry must be able to log in to the router without you having to enter the password every time.

On the Raspberry, generate a key (if you don't already have one): ssh-keygen -t rsa (press enter for all prompts)

Copy the key to the router: ssh-copy-id -p [ROUTER_SSH_PORT] [email protected]

Note: If ssh-copy-id doesn't work with Merlin, copy the contents of ~/.ssh/id_rsa.pub from the Raspberry and paste it into the router's web interface under Administration -> System -> Authorized Keys.

2. The automation

script Create a file called update_cert.sh on the Raspberry: nano ~/update_cert.sh

Paste this code (edit):

use script 1 or script 2 (no check)

SCRIPT 1
Code:
#!/bin/bash

############################################################
# Configuration (edit these values according to your setup)
############################################################

REMOTE_USER="router_user"
REMOTE_HOST="router_address"

# Paths to the certificate and private key on Asuswrt-Merlin
REMOTE_CERT="/jffs/.le/domain_ecc/fullchain.pem"
REMOTE_KEY="/jffs/.le/domain_ecc/domain.key"

# Local directory where certificates will be stored
LOCAL_DIR="/path/to/local/certs"

# Password for the generated PFX file
PFX_PASSWORD="your_pfx_password"

############################################################
# Script starts here
############################################################

# Create local directory if it doesn't exist
mkdir -p "$LOCAL_DIR"

# Get remote certificate hash
REMOTE_HASH=$(ssh ${REMOTE_USER}@${REMOTE_HOST} "sha256sum ${REMOTE_CERT} | awk '{print \$1}'")

# Get local certificate hash (if present)
if [ -f "${LOCAL_DIR}/cert.pem" ]; then
    LOCAL_HASH=$(sha256sum ${LOCAL_DIR}/cert.pem | awk '{print $1}')
else
    LOCAL_HASH="none"
fi

echo "Remote hash: $REMOTE_HASH"
echo "Local hash:  $LOCAL_HASH"

# Compare hashes
if [ "$REMOTE_HASH" = "$LOCAL_HASH" ]; then
    echo "Certificate unchanged. No action required."
    exit 0
fi

echo "Certificate changed. Updating..."

# Copy updated certificates from the router
scp ${REMOTE_USER}@${REMOTE_HOST}:${REMOTE_CERT} ${LOCAL_DIR}/cert.pem
scp ${REMOTE_USER}@${REMOTE_HOST}:${REMOTE_KEY} ${LOCAL_DIR}/key.pem

# Convert to PFX format
echo "Converting to PFX..."
openssl pkcs12 -export -out ${LOCAL_DIR}/certificate.pfx \
  -inkey ${LOCAL_DIR}/key.pem \
  -in ${LOCAL_DIR}/cert.pem \
  -passout pass:${PFX_PASSWORD}

echo "Update complete."

# (Optional) Restart a local service
# systemctl restart your_service

SCRIPT 2

Code:
#!/bin / hit

# --- CONFIGURATION ---
ROUTER_IP="192.168.1.1"
ROUTER_USER="admin"

# Typical path for Let's Encrypt certificates on Merlin
REMOTE_CERT_PATH="/jffs/.le/YOURDOMAIN.asuscomm.com"

LOCAL_DIR="/home/pi/jellyfin_certs"
PFX_PASSWORD="your_secret_pfx_password"
mkdir -p $LOCAL_DIR

# 1. Retrieve the file from the echo router
"Copying certificates from the router..."

scp $ROUTER_USER@$ROUTER_IP:$REMOTE_CERT_PATH/fullchain.cer $LOCAL_DIR/cert.pem
scp $ROUTER_USER@$ROUTER_IP:$REMOTE_CERT_PATH/YOURDOMAIN.asuscomm.com.key $LOCAL_DIR/key.pem

# 2. Convert to PFX (Jellyfin format)

echo "Converting to PFX format..."
openssl pkcs12 -export -out $LOCAL_DIR/jellyfin.pfx\
-inkey $LOCAL_DIR/key.pem\
-in $LOCAL_DIR/cert.pem\
-passout pass:$PFX_PASSWORD

#3. Permissions (Jellyfin must be able to read it)

chmod 644 $LOCAL_DIR/jellyfin.pfx
echo "Done! Now load $LOCAL_DIR/jellyfin.pfx into the Jellyfin panel."

Make the script executable: chmod +x ~/update_cert.sh

3. DNS and Port Management (Fundamental)

Since the certificate is for yourname.asuscomm.com, you have two scenarios:

From the outside: Go to the router (WAN -> Port Forwarding) and open port 8920 (external) to 8920 (internal, Jellyfin HTTPS) of the Raspberry. You will connect with https://yourname.asuscomm.com:8920.

From the inside: If you type 192.168.1.200 you will get the SSL error. You need to go to the router (LAN -> DHCP Server) and in the Manual or DNS Assignment section, associate the IP 192.168.1.200 to the name yourname.asuscomm.com.

4. Total Automation (Cron)

To do the Lampberry, see if there is a new certificate every week:

Type crontab -e. Add this line at the bottom:

0 3 * * 1 /bin/bash /home/pi/update_cert.sh (This will run the script every Monday at 03:00 in the morning).

One last important thing: on Jellyfin, remember to enable port 8920 (in the network settings) and select "Enable HTTPS". If you don't see port 8920 open, the script will load the certificate but Jellyfin won't use it.


In italiano...

1. Configura l'accesso senza password (SSH Key)

Perché lo script funzioni in automatico, il Raspberry deve poter entrare nel router senza che tu debba digitare la password ogni volta.


  1. Sul Raspberry, genera una chiave (se non l'hai già): ssh-keygen -t rsa (premi invio a tutto).​
    • Nota: Se ssh-copy-id non funziona con Merlin, copia il contenuto di ~/.ssh/id_rsa.pub del Raspberry e incollalo nell'interfaccia web del router sotto Administration -> System -> Authorized Keys.
  2. 2. Lo Script di Automazione


Crea un file chiamato update_cert.sh sul Raspberry:

Bash

Nano ~/update_cert.sh

Incolla questo codice (modifica le parti in grassetto):

Bash

#!/bidino/colpo


# --- CONFIGURAZIONE ---

ROUTER_IP="192.168.1.1"

ROUTER_USER="admin"

# Percorso tipico dei certificati Let's Encrypt su Merlin

REMOTE_CERT_PATH="/jffs/.le/TUODOMINIO.asuscomm.com"

LOCAL_DIR="/home/pi/jellyfin_certs"

PFX_PASSWORD="tua_password_segreta"


mkdir -p $LOCAL_DIR


# 1. Router file dal Prelievo

echo "Copiando i certificati dal router..."

scp $ROUTER_USER@$ROUTER_IP:$REMOTE_CERT_PATH/fullchain.cer $LOCAL_DIR/cert.pem

scp $ROUTER_USER@$ROUTER_IP:$REMOTE_CERT_PATH/TUODOMINIO.asuscomm.com.key $LOCAL_DIR/key.pem


# 2. Conversione in PFX (formato Jellyfin)

echo "Convertendo in formato PFX..."

openssl pkcs12 -export -out $LOCAL_DIR/jellyfin.pfx \

-inkey $LOCAL_DIR/key.pem \

-in $LOCAL_DIR/cert.pem \

-passout pass:$PFX_PASSWORD


# 3. Permessi (Jellyfin deve poterlo leggere)

chmod 644 $LOCAL_DIR/jellyfin.pfx


echo "Fatto! Ora carica $LOCAL_DIR/jellyfin.pfx nel pannello di Jellyfin."

Rendi lo script eseguibile:

Bash

chmod +x ~/update_cert.sh

3. Gestione del DNS e Porte (Fondamentale)

Dato che il certificato è per tuonomo.asuscomm.com, hai due scenari:

  • Dall'esterno: Vai nel router (WAN -> Port Forwarding) e apri la porta 8920 (esterna) verso la 8920 (interna, HTTPS di Jellyfin) del Raspberry. Ti collegherai con https://tuonomo.asuscomm.com:8920.​
  • Dall'interno: Se scrivi 192.168.1.200 avrai l'errore SSL. Devi andare nel router (LAN -> DHCP Server) e nella sezione Manual Assignment o DNS Hostname, associa l'IP 192.168.1.200 al nome tuonomo.asuscomm.com.​
  • 4. Automazione Totale (cron)


Per far sì che il Raspberry controlli se c'è un nuovo certificato ogni settimana:

  1. Digita crontab -e.​
  2. Aggiungi in fondo questa riga: 0 3 * * 1 /bin/bash /home/pi/update_cert.sh (Eseguirà lo script ogni lunedì alle 03:00 del mattino).
  3. Un'ultima cosa importante:Su Jellyfin, ricordati di abilitare la porta 8920 (nelle impostazioni di Rete) e spuntare "Abilita HTTPS". Se non vedi la porta 8920 aperta, lo script caricherà il certificato ma Jellyfin non lo userà.
 
Last edited:
SOLVED: final solution

BBelow is the method I tested for using the Asuswrt-Merlin Let's Encrypt certificate on a Raspberry Pi with Jellyfin.
I've added numerous comments so that even beginners (like me) can follow the steps safely.

Thank you for the information I received in this forum.

---

## 1. Passwordless SSH login (required for automation)

This step allows the Raspberry Pi to connect to the router automatically, without asking for a password.
It is essential for cron automation.

Generate an SSH key on the Raspberry Pi:

no pwd (Enter - Enter)

Code:
ssh-keygen -t rsa -b 4096 -f /home/pi/.ssh/id_rsa_router

Try to copy the key to the router:

Code:
ssh-copy-id -p <ROUTER_SSH_PORT> <router_user>@192.168.1.1

### If ssh-copy-id does NOT work on Asuswrt‑Merlin

This is normal. Merlin sometimes rejects ssh-copy-id.

In that case, install the key manually.

Show the public key:

Code:
cat ~/.ssh/id_rsa.pub

This prints a long line starting with:

ssh-rsa AAAA...

Copy the entire line (no line breaks, no spaces added).

Paste it into:

Administration → System → Authorized Keys

Save the settings.

Now the Raspberry Pi can log into the router without a password.
Code:
ssh [email protected] -i /home/pi/.ssh/id_rsa_router
---

## 2. Automation Script (sync + convert to PFX)

This script:

- connects to the router
- checks if the certificate changed
- copies the new certificate
- converts it to PFX (required by Jellyfin)
- saves it locally

Create the script:

Code:
nano ~/update_cert.sh

Paste this (edit the variables to match your setup):

Code:
#!/bin/bash

# -------------------------------
# USER CONFIGURATION SECTION
# -------------------------------

# Router SSH username
REMOTE_USER="router_user"

# Router IP address
REMOTE_HOST="192.168.1.1"

# Path to the Let's Encrypt certificate directory on Merlin
# IMPORTANT:
# Replace YOURDOMAIN_ecc with the actual folder name you see under /jffs/.le/
# Example: myname.asuscomm.com_ecc
REMOTE_CERT_DIR="/jffs/.le/YOURDOMAIN_ecc"

# Certificate and key inside the folder
REMOTE_CERT="$REMOTE_CERT_DIR/fullchain.pem"
REMOTE_KEY="$REMOTE_CERT_DIR/YOURDOMAIN.key"

# Local directory where certificates will be stored
LOCAL_DIR="/home/pi/jellyfin_certs"

# Password for the generated PFX file (Jellyfin requires it)
PFX_PASSWORD="your_pfx_password"

# -------------------------------
# SCRIPT STARTS HERE
# -------------------------------

# Create local directory if missing
mkdir -p "$LOCAL_DIR"

# Get remote certificate hash
# This allows us to detect if the certificate changed
REMOTE_HASH=$(ssh ${REMOTE_USER}@${REMOTE_HOST} "sha256sum ${REMOTE_CERT}" | awk '{ print $1 }')

# Get local certificate hash (if present)
if [ -f "${LOCAL_DIR}/cert.pem" ]; then
    LOCAL_HASH=$(sha256sum ${LOCAL_DIR}/cert.pem | awk '{ print $1 }')
else
    LOCAL_HASH="none"
fi

echo "Remote hash: $REMOTE_HASH"
echo "Local hash:  $LOCAL_HASH"

# Compare hashes
if [ "$REMOTE_HASH" = "$LOCAL_HASH" ]; then
    echo "Certificate unchanged. No action required."
    exit 0
fi

echo "Certificate changed. Updating..."

# Copy updated certificates from the router
scp ${REMOTE_USER}@${REMOTE_HOST}:${REMOTE_CERT} ${LOCAL_DIR}/cert.pem
scp ${REMOTE_USER}@${REMOTE_HOST}:${REMOTE_KEY} ${LOCAL_DIR}/key.pem

# Convert to PFX format (required by Jellyfin)
echo "Converting to PFX..."
openssl pkcs12 -export -out ${LOCAL_DIR}/jellyfin.pfx \
  -inkey ${LOCAL_DIR}/key.pem \
  -in ${LOCAL_DIR}/cert.pem \
  -passout pass:${PFX_PASSWORD}

# Set permissions so Jellyfin can read it
chmod 644 ${LOCAL_DIR}/jellyfin.pfx

echo "Update complete."

# Imposta permessi leggibili da Jellyfin
chmod 644 ${LOCAL_DIR}/jellyfin.pfx

# Riavvia Jellyfin per caricare il nuovo certificato
sudo systemctl restart jellyfin

echo "Done. New certificate exported to jellyfin.pfx and Jellyfin restarted.

Make it executable:

Code:
chmod +x ~/update_cert.sh

---

## 3. DNS and Port Handling

### External access
Forward port 8920 (Jellyfin HTTPS):

WAN → Port Forwarding
External 8920 → Internal 8920 → Raspberry Pi IP

Access Jellyfin externally via:


### Internal access
If you use the LAN IP (e.g., 192.168.1.200), you will get a certificate mismatch.

Fix this by adding a DNS override:

LAN → DHCP Server → Manual Assignment / DNS
yourname.asuscomm.com → 192.168.1.200

---

## 4. Cron automation

This runs the script every Monday at 03:00.

Edit crontab:

Code:
crontab -e

Add:

Code:
0 3 * * 1 /bin/bash /home/pi/update_cert.sh
for restart JellyFin
Code:
sudo visudo

add
Code:
pi ALL=NOPASSWD: /bin/systemctl restart jellyfin

---

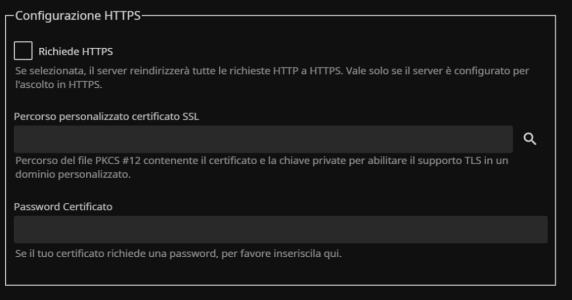
## 5. Jellyfin settings

In Jellyfin:

- Enable HTTPS
- Set port 8920
- Load the file:

jellyfin.pfx
 
Last edited:

Support SNBForums w/ Amazon

If you'd like to support SNBForums, just use this link and buy anything on Amazon. Thanks!

Sign Up For SNBForums Daily Digest

Get an update of what's new every day delivered to your mailbox. Sign up here!
Back
Top